


How to replace a plank?
When a plank is damaged (impact, hole, …), it is entirely possible to replace it. Find our tips to learn how to do it.
What tools are needed to replace a plank?
- A circular saw
- A woodworking chisel
- A hammer
- A heavy weight or object
- Wood adhesive such as Panaget Presto BIB
- A drill
- A pencil
- A block
- A ruler
The different steps to replace a plank
To find out how to replace a plank, follow the steps below.
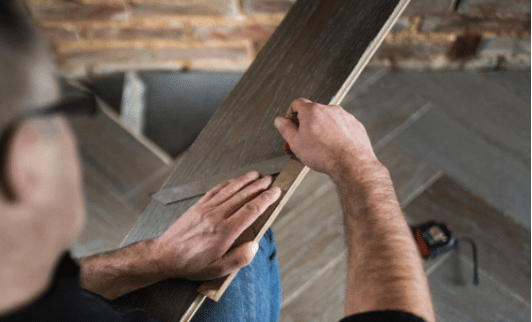
Cut out the damaged plank
- Drill 4 holes in the corners of the damaged plank 1.5cm from the edge.
- Using a ruler and a pencil, connect the 4 holes to create a cutting line.
- Using the plunge saw, cut the thickness of the plank along the rectangular lines that connect the 4 holes.
Remove the damaged plank
- Take your woodworking chisel and place it in one of the grooves made using the circular saw.
- Strike the chisel with a hammer so that it penetrates the groove and use it to pry out the middle part of the plank.
- Then remove the remaining 1.5 cm edges using the woodworking chisel.
- Vacuum all the debris thoroughly.
Fit the new plank
- Remove the bottom flange of the grooves and the end tongue.
- Apply wood adhesive to the tongues of the adjacent planks.
- Fit the replacement plank and tap it with a block and hammer so that the adhesive soaks in properly.
- Leave a weight on the plank for 24 to 48 hours until the adhesive has dried.
You now have all you need to know to be able to replace a plank in record time! And if in doubt, don’t hesitate to contact us.