


How to install a tongue-and-groove floating wood flooring?
The “floating” installation method can be done with either click-lock or tongue-and-groove wood flooring. Let’s focus on installing a tongue-and-groove floating wood floor, which involves assembling the planks with glue(1).
How to prepare for installing a tongue-and-groove floating wood floor?
Here are some tips before you start the installation:
- Ensure your room’s floor is level using a spirit level (make sure to level it if there is more than 5mm deviation under a 2m straightedge or 1mm under a 20cm straightedge).
- Make sure your room’s floor is perfectly clean and dry.
- Decide the direction of the wood flooring installation, either parallel to the longest wall of the room or in the direction of the natural light.
- Let your packs of planks rest for 2 to 3 days in the room without opening them, keeping them off the floor (for example, on a pallet). This waiting period prevents future deformations by allowing the wood to acclimate to the humidity and temperature.
- For a more homogeneous and balanced final look, mix planks from different packs to vary the shades and lengths.
How to measure floating wood flooring?
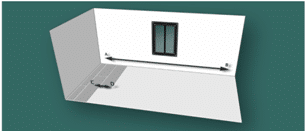
Using a measuring tape, calculate the number of rows needed to cover the width of the room—this will determine the dimensions for cutting the first and last planks.
To do so, divide the length AB of your room by the width CD of a plank to get a reference value, which you will round down (for example, if you get E = 24.8cm, round down to 24cm).
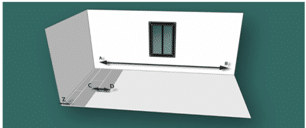
To trim the width of the first row harmoniously, we recommend the following calculation: [AB – (E × CD)] divided by 2. This calculation will give you the width of your first row.
Next, unroll the insulating underlay on the floor, strip by strip, perpendicular to the direction of the wood floor planks. Once unrolled, tape them together edge-to-edge, ensuring they do not overlap. Depending on the intended use of the room, find out the best underlay for your floating wood floor.
How to cut and install a tongue-and-groove floating wood floor?
First, ensure that the room’s humidity level is not too high.
Unroll the underlay on the flat, dry, stable, and clean substrate. Place the strips edge-to-edge and tape them together.
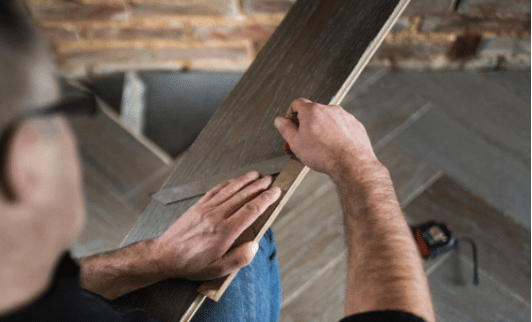
Now, it’s time to lay the first plank: cut the tongue at one end, then place it in a corner with the groove facing the wall. For the other planks, simply glue the tongue and fit them into the previous ones. If there is excess glue on the surface, always keep a cloth or sponge handy to wipe it off immediately.
For the final plank length of the first row, consider the expansion gap of the wood flooring! This gap should be at least 8mm and will depend on the length of the room. Therefore, place spacers between the wall and the end of the rows.
For the following rows, start with the offcut from the last plank of the previous row, if it is at least twice the width of a plank. Then, repeat the tongue-and-groove gluing, also gluing the length of each plank to the previous one.
For the final row, measure the remaining space considering the peripheral gap, cut, and glue.
Let the wood floor settle for 24 hours before removing the spacers and installing the baseboards.
(1) Panaget guarantees its collection Diva 7 1/4” wide – 9/16 thickness is compatible with nail-down / staple installation over CDX grade, kiln-dried plywood subfloor, according to industry accepted practices (as outlined by the National Wood Flooring Association installation guidelines). This excludes installation over sleepers.
To assist you with installing your floating wood floor, we offer a Panaget advice sheet in addition to our step-by-step video guide.